
Tyler Brandt, Staff Writer.
You are three days out from a wedding, or just back from a long weekend, and the polish on your left hand has already lifted at the corner of your thumbnail while the right hand still looks fresh. You did the same thing to both hands. That small asymmetry is the real clue: gel-effect polish rewards technique far more than it rewards the bottle.
Here is the fact most labels leave out. Gel-effect polish is not gel. It skips the UV lamp entirely and dries by air, using fast-hardening resins that mimic the glassy finish of a true gel manicure without the lamp cure underneath. That single difference explains almost every chip, lift, and peel that shows up over the next two weeks, and it explains why two people using the identical bottle can get wildly different results from the same manicure.
This guide walks through what actually makes gel-effect polish hold up against dish soap, hot showers, and a full week of typing, and where the routine most people follow at their bathroom sink quietly sets the polish up to fail.
- Thin coats cure harder than one thick coat: a heavy layer skins over on top while staying soft underneath, and that soft core is what cracks first.
- The free edge, not the surface, is where most chips start: sealing the tip of the nail during each coat prevents the separation that shows up by day three.
- Water and heat wear polish down faster than time does: long hot showers, dish soap without gloves, and constant hand sanitizer break down the top coat well before the color itself gives out.
Why Gel-effect Polish Fails Differently Than A Gel Manicure
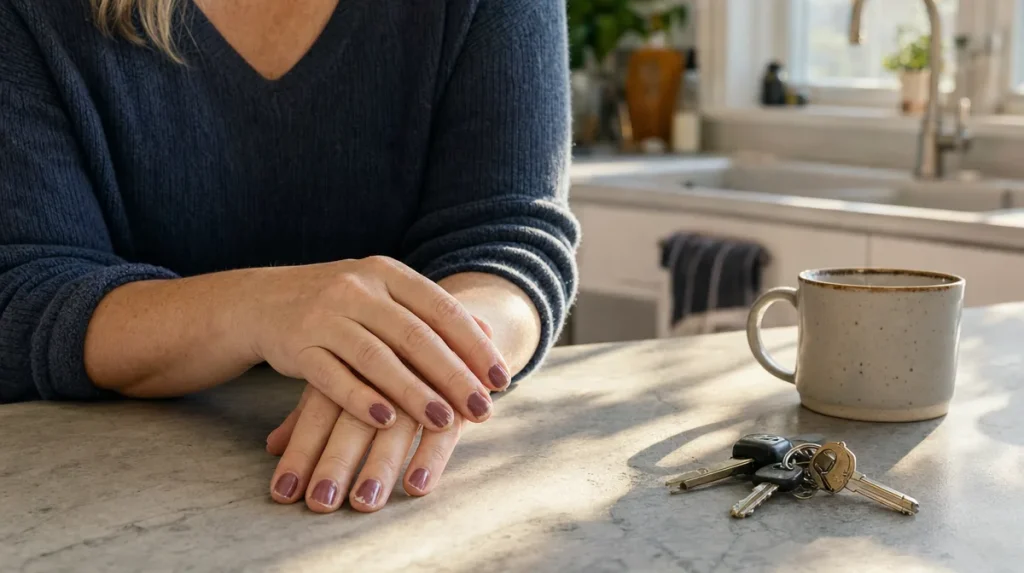
Gel-effect polish is not gel. It skips the UV lamp and cures by air, using resins and film-forming polymers that dry hard and glossy on their own. That difference matters more than most labels admit.
Think of a true gel manicure as a coat of clear epoxy on a rigid surface: it hardens into one continuous shell under UV light. Gel-effect polish behaves more like a thin sheet of dried rubber cement stretched over something that keeps moving, your nail, which flexes every time you type, open a jar, or peel a sticker. A hard film with no give will crack at the point of most movement first, usually the tip or the corner near the cuticle.
That is why gel-effect polish chips at the free edge before it fails anywhere else. It is not lifting from bad luck. It is a rigid film losing a fight with a flexible surface, and the fix starts with prep and technique rather than a better bottle.
Prepping The Nail Bed So Polish Has Something To Grip
Most early chipping traces back to what happened before the brush ever touched the nail.
Start by pushing back cuticles gently after a warm soak, never cutting living skin. Buff the surface lightly, just enough to knock down the shine, not to thin the nail. A nail that still looks glossy under light has natural oils sitting on it, and polish cannot bond to oil.
Wipe each nail with a lint-free pad and isopropyl alcohol, or a dedicated dehydrator, right before applying color. This step gets skipped constantly, and it is the single biggest reason a manicure done at home lifts on day two while the same polish done right lasts a week and a half.
Self-test: run a fingertip lightly across a bare, prepped nail. It should feel slightly dry and matte, almost like paper, not slick. If it still feels slippery, the polish will have less to hold onto no matter how many coats you add.
The Base Coat Most People Either Skip Or Waste
A base coat is not decoration under the color. It is the layer that actually adheres to keratin, and the color coats mostly adhere to it, not to the nail directly.
Ridge-filling base coats work well on textured nails but dry thicker, so one coat is enough. Applied twice, a ridge-filler tends to stay slightly tacky underneath and sets up the color for early peeling, which readers often mistake for a bad batch of polish.
Let the base coat dry until it no longer looks wet before adding color. Rushing this by even ninety seconds is one of the most common mistakes in an at-home routine, because the color coat traps solvent underneath a still-soft base, and that trapped layer is what eventually gives way at the edges.
Why Thin Coats Beat One Thick Coat Every Time
A single thick coat looks efficient. It is also the fastest way to a manicure that chips within forty-eight hours.
Thick polish dries on the surface while the layer underneath stays soft, the same way a thick coat of house paint skins over while the paint beneath stays wet for a day longer. That soft interior never fully hardens, and it flexes with the nail instead of resisting it.
Two thin coats, each allowed two to three full minutes before the next layer, cure harder all the way through. The visible finish looks nearly identical. The difference shows up four days later, when the thin-coat manicure is still glossy at the tips and the thick-coat one has already lifted.
A 2019 study in the Journal of Cosmetic Science, testing wear patterns across roughly 150 manicured nails over two weeks, found that film thickness correlated more strongly with early chipping than the brand or formula of polish used. Technique outperformed product in that comparison, which lines up with what most nail technicians see across a chair full of clients each week.
Sealing The Free Edge, The Step That Saves A Manicure
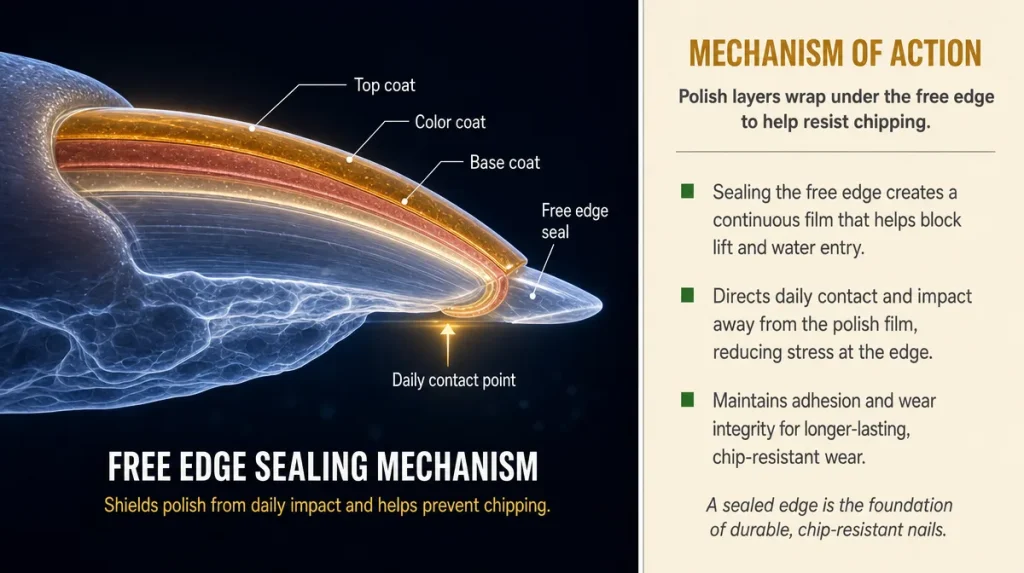
The tip of the nail, the free edge, takes more daily contact than any other part: keys, phones, zippers, dish soap. It is also the part people paint least carefully, because it is awkward to reach with a brush.
After painting the top of the nail, drag the brush lightly along the very edge, wrapping a thin line of polish underneath the tip. This wrap seals the layers together at the exact point where they would otherwise peel apart first.
Skipping this step is invisible in the first photo of a fresh manicure and obvious by day three, when the polish looks intact on top but has already separated at the tip. It takes about four extra seconds per nail, and it is the difference most people credit, wrongly, to a better top coat.
What The Top Coat Is Actually For
A good top coat does two jobs: it levels brush strokes into a smooth, glass-like surface, and it slows the rate at which the layers underneath absorb water and swell.
It does not make a poorly prepped manicure last longer. Readers often upgrade their top coat looking for durability that no bottle can deliver if the base coat was skipped or the coats underneath were too thick.
Apply top coat within the same sitting, while the color is still slightly workable, so the layers bond as one film rather than sitting as separate skins that can shear apart. Reapplying a fresh layer every three to four days extends wear noticeably, since it is usually the outermost layer that scuffs first from everyday friction, not the color underneath.
Reading Your First Forty-eight Hours Honestly
The first two days tell you almost everything about how a manicure will age, if you know what to look for.
Check the edges under bright light, a bathroom vanity light works better than an overhead fixture. Fine, hairline separation at the very tip by day two is normal, not a failure. A visible gap you can catch a fingernail on, or color lifting off in a sheet near the cuticle, points back to prep rather than the polish itself.
Self-test: press a fingertip firmly against a hard surface, a countertop or a book spine, for two seconds. A well-prepped manicure will show no change. One with trapped moisture underneath will often show a faint white blanch that fades slowly, a sign the base coat did not fully bond before the color went on.
What Actually Shortens Wear: Water, Heat, And Habit
Hot water is harder on gel-effect polish than most people expect. Washing dishes without gloves, or long showers in winter when the heat is cranked and the bathroom fills with steam, softens the film and speeds up lifting at the edges.
Humid East Coast summers cause a different problem: polish takes longer to fully cure because ambient moisture slows solvent evaporation, so a manicure done on a humid afternoon may need extra drying time between coats compared with the same routine in a dry winter apartment with the heat running.
Hand sanitizer, used constantly since 2020, also degrades the top coat faster than most people realize, since the alcohol that kills germs belongs to the same solvent family that breaks down polish film. None of this means avoiding sanitizer or dish soap. It means budgeting for a top coat refresh every few days rather than expecting one manicure to survive untouched for two weeks.
Removing It Without Thinning Your Own Nails
The damage from gel-effect polish rarely comes from wearing it. It comes from taking it off badly, repeatedly, over months.
Peeling polish off in sheets pulls away surface layers of the nail plate along with it, which is why nails often look thin and flaky after a summer of manicures that were picked at rather than properly removed. Soaking a cotton pad in remover, pressing it against the nail, and wrapping it in foil for ten minutes softens the film so it lifts away in one piece instead of tearing.
The American Academy of Dermatology’s public guidance on nail care notes that repeated trauma to the nail plate, including aggressive filing and peeling of polish, is a common and preventable cause of weak, brittle nails. Giving nails a few unpolished days between manicures, with a plain nourishing oil at night, lets the plate recover before the next coat goes on.
Key Takeaways
- Gel-effect polish cures by air, not UV light, so it fails where the nail flexes most: the tip and the free edge.
- Prep decides more than product. A dehydrated, lightly buffed nail holds polish far longer than a thicker top coat ever will.
- Thin coats, patience between layers, and sealing the free edge solve most of the chipping people blame on the brand.
A Quick Checklist Before You Paint
- Push back cuticles after a warm soak, never cut them.
- Buff lightly until the shine is gone, then wipe with alcohol or a dehydrator.
- Apply one thin base coat and let it fully dry.
- Paint two thin color coats, wrapping the brush under the free edge on each.
- Finish with a top coat, refreshed every few days.
- Wait two full days before judging the results, and check under bright light.
This article is for general information and does not replace advice from a dermatologist or licensed nail technician.
Individual results vary depending on nail health, habits, and environment.